Simple Set Up
Affix Mounting Posts to Sides of Opening
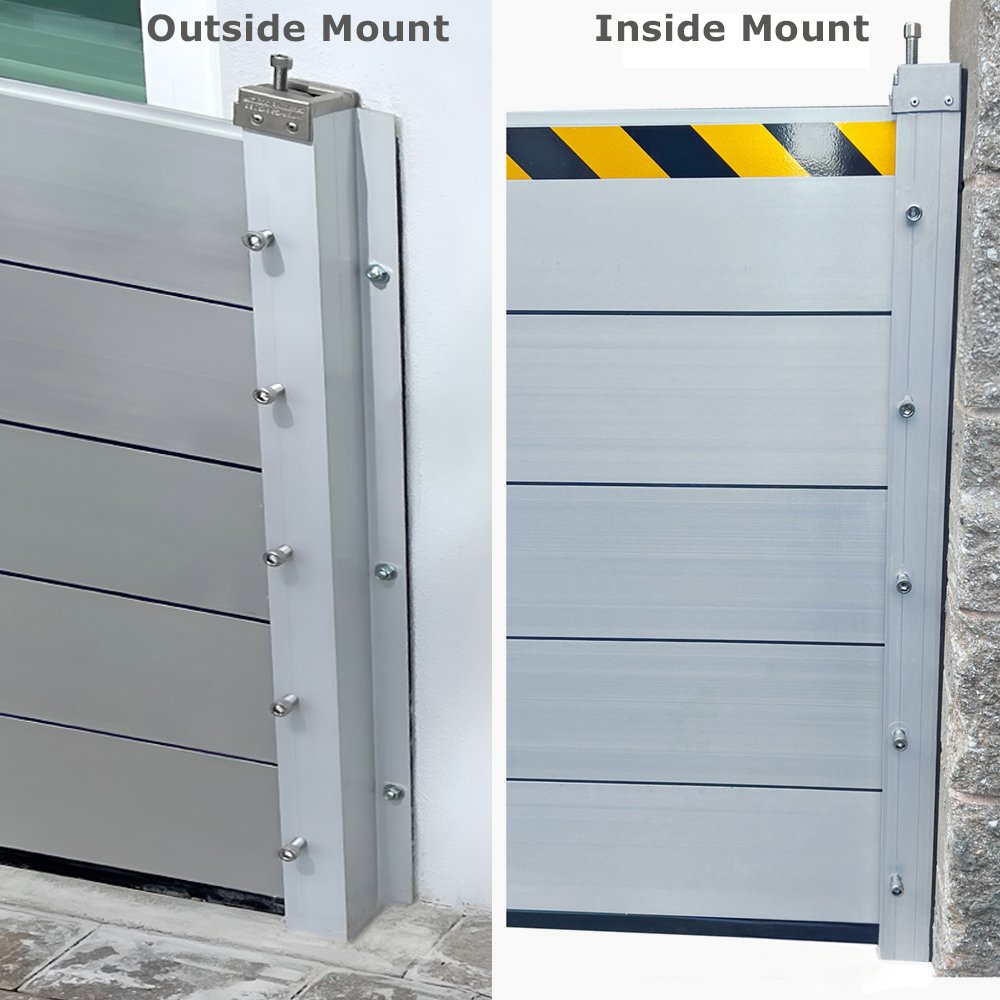
- Decide if you prefer to install posts inside your opening or just to the outside of the opening. We tend to prefer outside, if possible, as the wall itself offers some additional support.
- Check that outside rubber seals are facing the wall in the direction that the post is to be installed and that the U-channel opening is facing the opening (ready to receive a plank).
- Use a hammer drill to drill holes for expanding wall anchors (included).
- Insert and expand anchors to mount posts to the wall. It is important that these be inserted into a solid concrete, cinderblock, or cement wall, for greater stability of the system.
Insert Planks Into U-Channel Posts
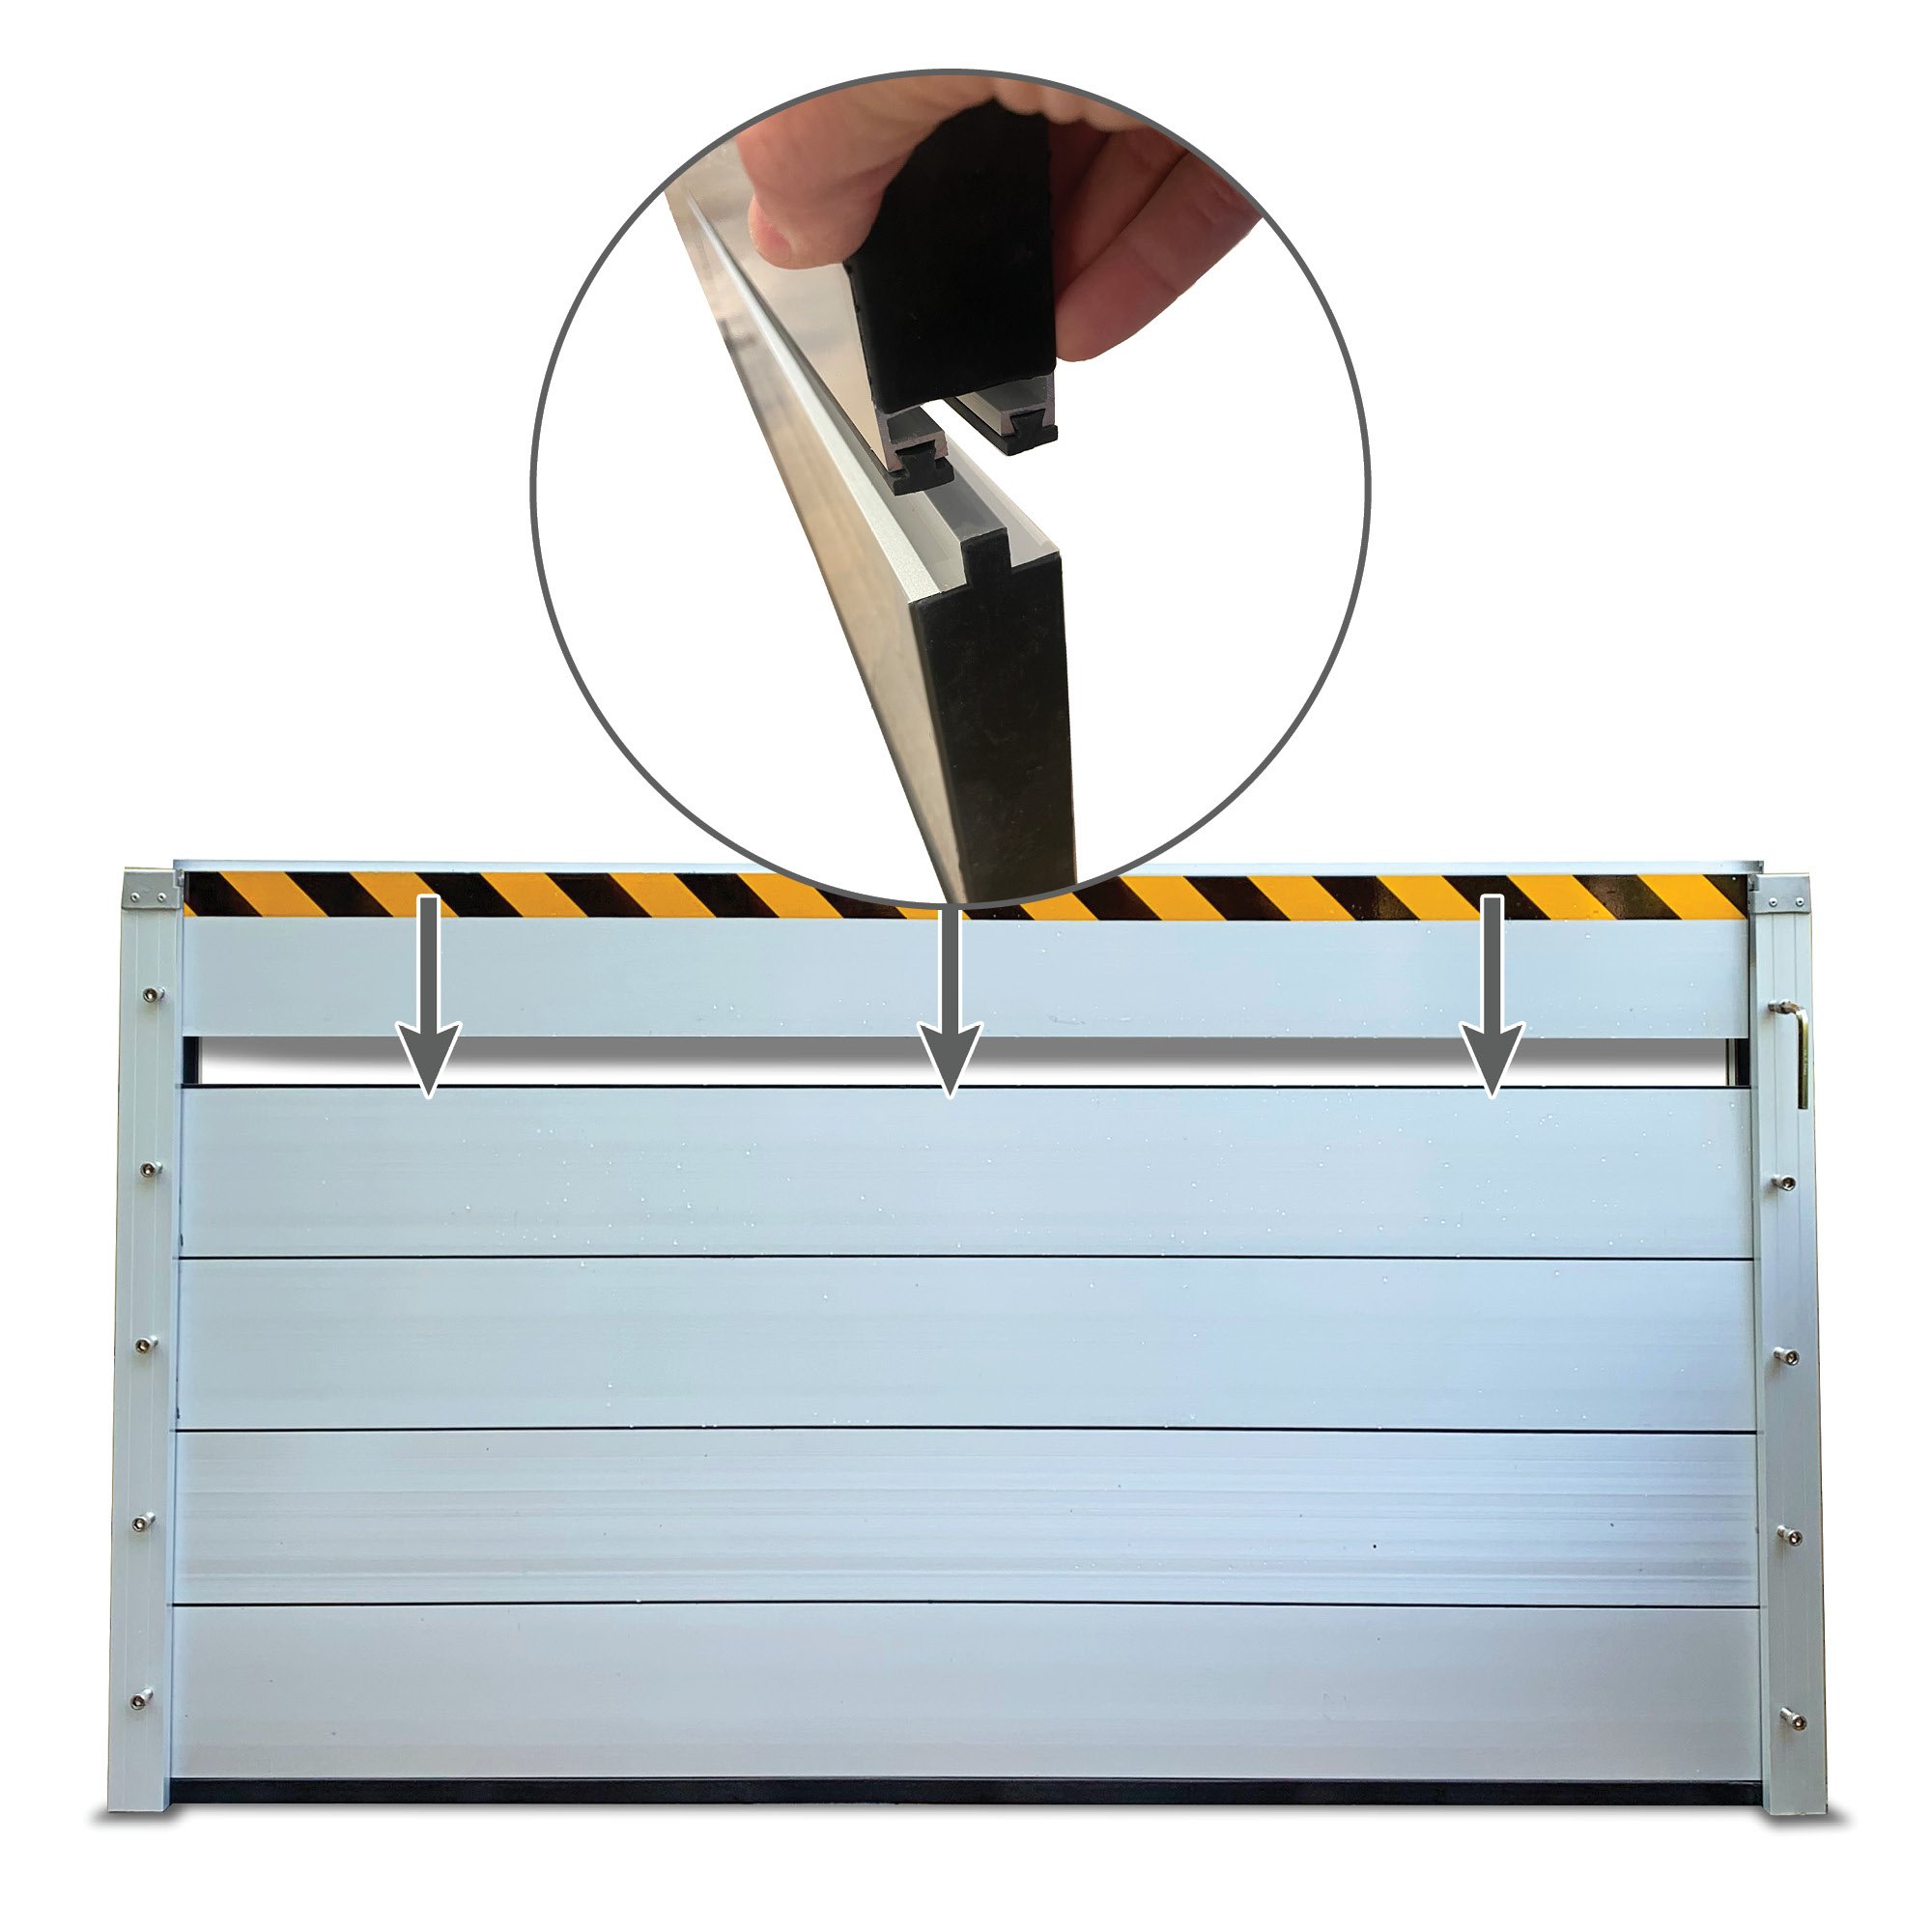
- When a flood is expected, insert planks into the U channels on either side of the door opening.
- It is important to loosen the tightening bolts and the top locking bracket, in order to get slats into the opening.
- Be sure that rubber seal is facing downwards in order to make a good seal with the ground below. Apply some pressure to the lower slat to create a good seal.
- Continue to insert slats until all flood barrier slats are in position, ready for tightening.
Note: If reflective warning tape was selected with your order, place the slat with tape last (at the top).
Tighten Planks Into U-Channel Posts
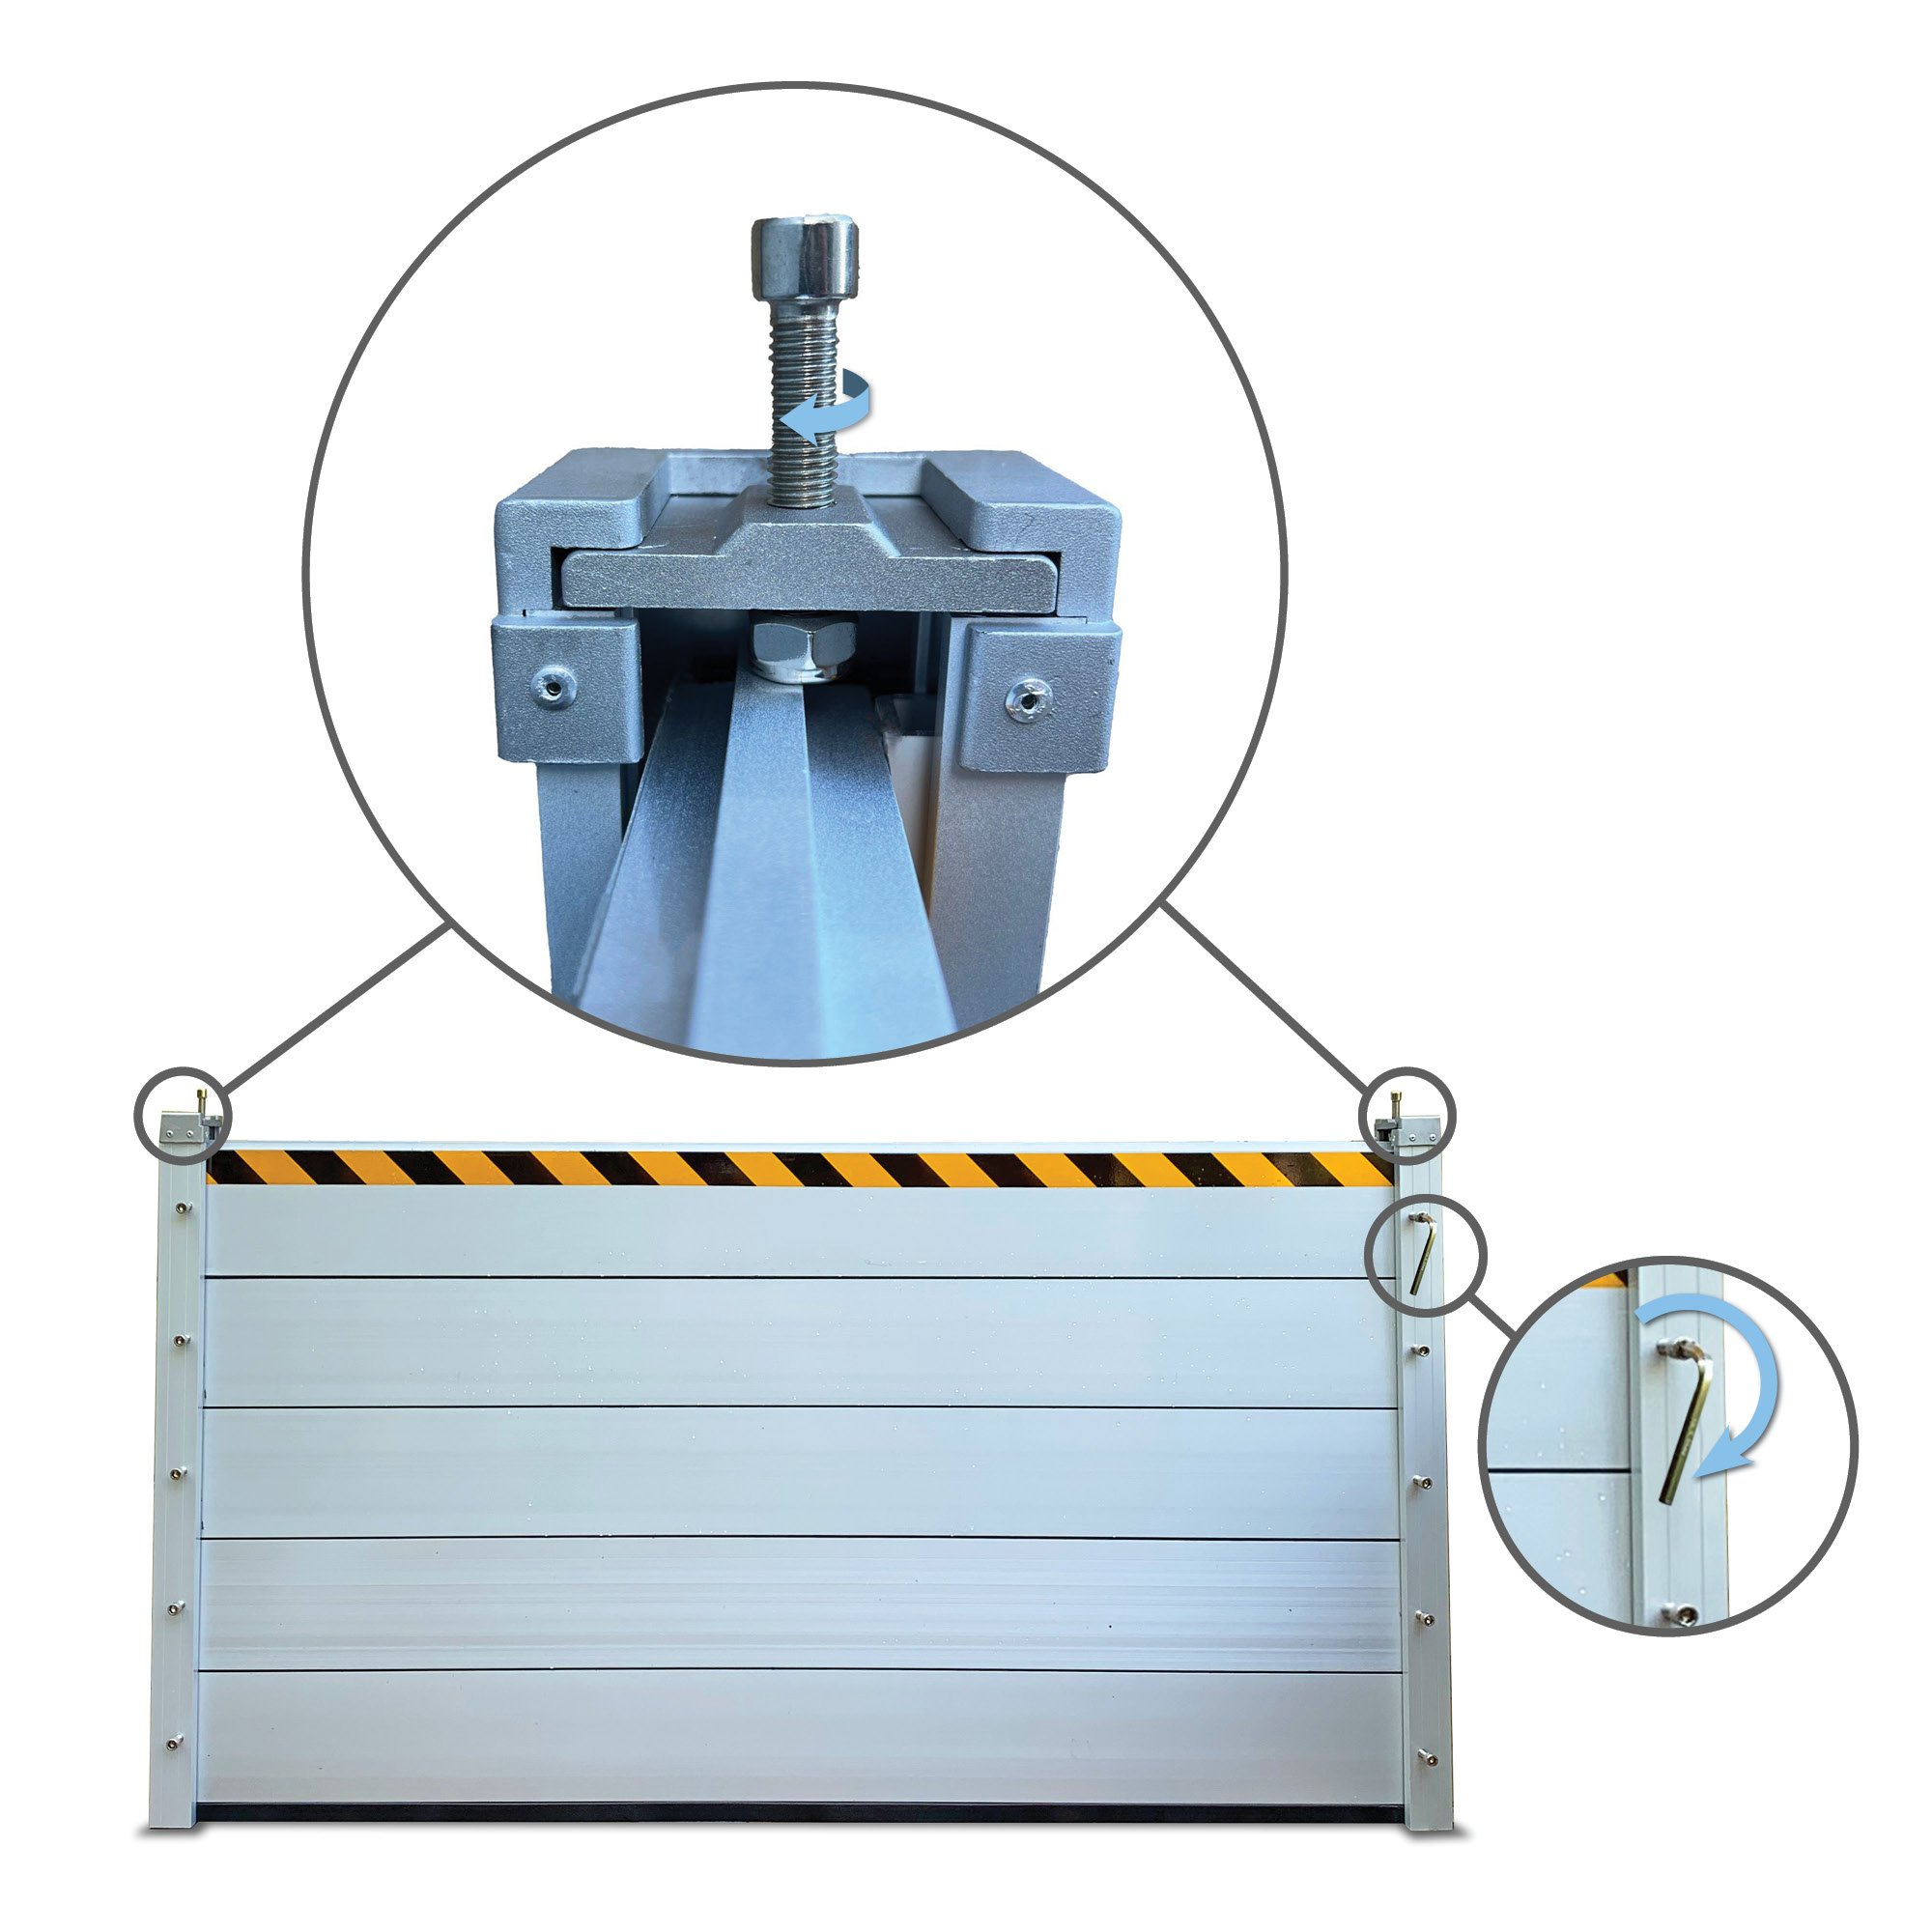
- Use the included Allen wrench to tighten flood planks into position and against the internal rubber seals.
- Insert top locking clamps into the post top slot. Use the Allen wrench to tighten down the clamps and to apply pressure to flood planks below, enhancing the seal between slats.
- Use the tightening bolts on the posts to tighten down the planks within the U-channel and to ensure a seal with the neoprene strips within the channel.
- When a flood is over, simply remove planks in the reverse order, clean off any debris, dry and store your flood barrier for future use.